Naming

In 2013 I was invited to create work for a show curated by Nancy Crow based on the traditional quilt block “Bull’s Eye”. I ended up making 4 pieces. Below is the third one in this miniseries.

I had so much fun making this piece. It is vibrant and energetic. But when it was finished I didn’t quite know how to name it. I have been working in my garden series for several years now, and the temptation was so call it something like cosmic bloom to make it “fit” in the series. But this didn’t feel right. So instead I delayed the decision. After I finished the binding I stored this and moved on to my next piece. However, I wanted to share it, so I needed to finally name it.

2019 Flying Sparks 69”w x 65.5” h, hand dyed fabrics, wool batting, machine quilted

2019 Flying Sparks 69”w x 65.5” h, hand dyed fabrics, wool batting, machine quilted

When I look at this piece I think of many things: fireworks, african headdresses, comets, hurricanes, vortexes, June Carter Cash’s song “The Ring of Fire.” As I was working on the piece I called it Flying Sparks. This name doesn’t fit in my garden series, but it is apt for the composition. Sometimes it is better to not over complicate things.

2019 Flying Sparks detail

2019 Flying Sparks detail

The Power of Synergy

When I moved to Auckland, New Zealand in 1999 I joined the Auckland Quilter’s Guild in order to meet like minded people and make friends. At the end of every meeting the guild held “Show & Tell” for quilters to share their most recent work. I showed a large piece called “Rhythms of Africa.” Below is the only digital photo I have of this piece currently. It is an early work where I was playing with proportions and color trying to create depth and movement. As you can see at this time I was still riffing on traditional patchwork forms.

“Rhthyms of Africa” 1999, commercial cottons, hand and machine quilted. Approximately 115 inches wide by 90 inches tall. Photo from 2010

“Rhthyms of Africa” 1999, commercial cottons, hand and machine quilted. Approximately 115 inches wide by 90 inches tall. Photo from 2010

After I showed my work, Lesley Aspin introduced herself to me. Turned out she lived only a street down from me. We quickly became good friends. We went to quilt shows and quilt shops together and we both took our first Nancy Crow class together when Nancy taught in New Zealand in 2002. We both found this class inspiring and we began to implement what we learned from Nancy in our studio practices. We also traveled to the States together to continue studying with Nancy Crow at The Barn.

I vividly remember Nancy telling us how lucky we were to have each other as we both aspired to pursue quilt making as artists. Over the next four years Lesley and I gave each other valuable feedback as we worked in our studios. I am convinced we both developed more quickly having each other to talk to about our work. We had a shared vocabulary and understanding of what we were trying to accomplish as we worked toward the same goals. We had a creative synergy that propelled the development of our work.

Lesley and I both had work juried into Quilt Auckland National Symposium held in Auckland in 2005. Our work was very distinct from the other pieces in the show, and distinct from each other. We both had grown a lot since our first class with Nancy. Below are two of our pieces from that show.

“Whitecaps and Waves” 2004, 32” w by 55” h commercial cottons, machine quilted Pamela Loewen

“Whitecaps and Waves” 2004, 32” w by 55” h commercial cottons, machine quilted

Pamela Loewen

“Stepping Stones” 2004 approximately 48”w by 60”h commercial and hand dyed fabrics, machine quiltedLesley Aspin

“Stepping Stones” 2004 approximately 48”w by 60”h commercial and hand dyed fabrics, machine quilted

Lesley Aspin

The next year I moved back to the States. Lesley gave me her piece from the show. I had wanted to buy it, but she insisted she wanted to give it to me as a gift. It proudly hangs in my home in my living room. I have never found another kindred spirit like Lesley.

Part of the reason I want to have a gallery and begin teaching is to create a community where likeminded people can meet, show their work and create synergistic relationships that enable them to grow as artists. If you are interested in being part of this future community please use my contact information to send me your email to sign up for my upcoming newsletter. Your email will be kept confidential.

Developing Artistry

The past 5 weeks I have been traveling. I went to my nephew’s wedding, celebrated my Dad’s 80th birthday twice, visited my beloved cousin Eric as he battles terminal cancer, and got necessary medical treatments at a specialty clinic in San Diego. Traveling at this time presents its own challenges, but it is doable. Be assured that airports, airlines, hotels and car rental companies have new standards for cleaning and extra safety precautions. But as I traveled I was again struck by how much life has been changed by this virus. It is mentally draining. While I was glad to be able to do all of these very important things, returning home I was saddened at our collective loss. So it is taking a bit longer than usual to refocus my attention in my studio.

When I have had a break from art making, I often do small sewing projects to ease myself back into my studio mindset. Luckily my daughter had the perfect job for me. One of Winona’s favorite tee shirts got stained. She asked me if I could cut out the graphics and put them on her denim jacket. I have lots of experience sewing on denim from years of patching jeans. In my well stocked studio I had everything I needed: fusible interfacing, backing material for the patch, the correct sewing machine needle and the perfect color & weight of variegated thread.

Jacket Front.jpg

The definition of an artisan is a skilled manual laborer, a craftsperson, skilled in the arts. How does one develop any skill? Through gaining knowledge and practice, practice, practice. The internet allows us to look up how to do almost anything. In fact I googled how to sew a tee shirt on a denim jacket just to refresh my mind and see if there were any helpful tips to create a better finished project. Knowledge is readily available.

Practice is the next step. Lots of practice. That whole 10,000 hours thing is really true. And you have to start where you are. Some people give up because the first thing they make isn’t as good as they envision in their heads. I describe this as wanting to fly before you know how to crawl. Other people give up because what they made isn’t as good as someone else’s work. Comparison is a killer. You will always be able to find someone who is better than you.

Turn your focus inward. Take an honest inventory of your own abilities. Do you posses all of the foundational skills of your craft? If not, that is always a great place to start. Working toward mastery is how you develop your artistry.

Jacket back.jpg

Getting Unstuck

Have you ever hit a wall while working on a project? This happened to me recently. Last May I started machine quilting a major work, roughly 100” wide by 90” tall. When I begin machine quilting I start on a figure in the center and work my way out to the edges. The central figure in this piece is dark purple and it is surrounded by shades of white and other light fabrics. As I was working, somehow I got a black oil stain on a light area. I guess it is from the dual feeder mechanism on my Bernina 830, but I do not know for sure. This was a problem. So I tried to get the stain out with warm sudsy water and a toothbrush. As water seeped into the quilt top while I scrubbed, dye started to run from some of the dark fabrics to the light ones. Now I had an even bigger problem. My heart sank. The oil stain was still visible, but not as dark; however, the dye stains were even worse. I stepped away from the piece and started researching my options. For days the piece sat untouched.

Multiple problems: stain spot, and at least two fabrics bleeding onto lighter areas.

Multiple problems: stain spot, and at least two fabrics bleeding onto lighter areas.

I looked up how to remove dye from quilt tops. I asked a friend her advice. She suggested taking out the stained fabric and replacing it, but I wasn’t ready to consider that yet. I mulled. I stewed. I started a new composition. I finished machine quilting another smaller work. I made the decision to boldly go on and proceed quilting the piece, hoping it would all wash out in the end. But somehow I could never get back to work on the project.

Finally, after two months, I presented my problem to my on-line fabric dying group. I have to admit that I was a bit ashamed to have this problem. Obviously I had not processed my fabric properly. I had two different fabrics bleeding excess dye. But denying reality never changes reality. So I humbly posted my pictures and asked for help. To my surprise my dye instructor answered immediately (love you Carol Soderlund!), but she said the same thing my friend had said two months earlier. She pointed out I had one of the hardest problems having the bleeding dark purples next to the lightest of fabrics. Most likely the dye stains would not wash out in the end. And I knew there were other areas where those same fabrics would also bleed during my final wash after all my machine quilting was done. The problem would only grow.

It was time for me to squarely face the facts. The best solution was to ripe out the 18 hours of machine quilting. Take out all of the hand basting (another week’s work), and then take apart the actual quilt top to remove both the stained pieces, and the fabrics that were bleeding.

Luckily, thanks to Nancy Crow (adore you too Nancy!), this is not the first time I have ripped out the basting on a major composition and reworked the pieced top. For those of you who are not quilt makers, hand basting a large quilt top is one of my least favorite tasks in the whole quilt making process. Honestly the thought of having to rebaste this large piece was why I was so reluctant to do what needed to be done. But I knew I could do it, because I have done it before. It just took me two months to accept that this was the best solution. My husband encouraged me. He assured me the composition is a strong piece and worth the effort.

So I spent two days ripping out small machine quilting stitches. Once I made this decision and moved forward on the piece, I felt deeply relieved. Yes, it would take significantly more time to finish this piece, but this way I know I can fix the issues.

The quilted area as seen from the back. Dye stains are visible here too.

The quilted area as seen from the back. Dye stains are visible here too.

I used a seam ripper on the back thread and cut every 4th stitch. Then I pull out the long thread on the front side of the quilt top.

I used a seam ripper on the back thread and cut every 4th stitch. Then I pull out the long thread on the front side of the quilt top.

So where are you stuck? What is keeping you from moving forward? Sometimes the best way forward involves taking a step backward.

The birthplace of Ideas

I took my first quilting class when I was 24 years old. It was your standard traditional sampler class. Each week you learned how to piece a different shape and different kinds of block designs built on said shape. Even in that class I was one of the youngest students. Fast forward to my first class with Nancy Crow. I was 38 and definitely the youngest woman in the room. Most of the other students were in their 50’s and 60’s. As part of the Crow class, students are given 20 minutes to give presentations of their work, and then other students could ask the presenter questions. I have done many Crow classes and several presentations. Below is a finished study from my second class, “Strip-piecing & Restructuring #3”, with Nancy Crow in 2003. This study was done on my first trip to the Barn.

“Study-SP3” 2003, 48” w by 43” h commercial fabrics, hand quilted

“Study-SP3” 2003, 48” w by 43” h commercial fabrics, hand quilted

One of the questions I am most frequently asked is “Where do you get your ideas?” This is not an area where I have ever struggled. I have always felt that I have more ideas than time! And almost anything can spark an idea for me — nature, books, music, museums, travels, conversations — the list is endless. I have always been blessed with a very vivid imagination and a curious mind.

I am also a booklover. I read all kinds of books. One of the things I loved about living in New Zealand was the access to British books in the bookstores. I miss that. Anyhow, a well stocked and deeply read library is a great foundation for generating ideas. Between my husband and I, we collect books on birds, flowers, trees and of course, art. This has been a wonderful resource while quarantining at home. Do you want to study variations on a motif? Look closely at a bird book. Thanks to my husband we have all of the volumes of the Handbook of the Birds of the World by Lynx Edicions. Below is page 190 from Volume 5 Barn-owls to Hummingbirds.

The variations on motifs in nature are often illustrated in handbook and identification guides.

The variations on motifs in nature are often illustrated in handbook and identification guides.

And if you want to dive more deeply into the art world read the text of your art books! Of course I love the pictures of all of the artwork, but I learn even more by reading about the artwork! I recently finished the catalog to the “Hockney — Van Gogh: The Joy of Nature” published by the Van Gogh Museum, Amsterdam, 2019. I read it from cover to cover. It talks about perspective, color, and new ways of representing space, light and time. The conversation with David Hockney at the end is a must read. This is just one of the many art books in my library.

So how are you generating your ideas? How are you growing in your knowledge? How are you gathering imagery meaningful to you? What’s in your library?

One of my art book shelves

One of my art book shelves

Taking Refuge in my dye studio

I must admit that the extended lockdown in my state has impacted my creativity. I have struggled to stay positive. It’s hard work to stay focused. But luckily in the medium of quilt making there is plenty of other work to do away from the design wall. Personally, when in doubt I like to hit the dye studio. Creating new fabric to use in my compositions does not require the same kind of mental energy and emotion as starting a new piece. And I have adopted a new attitude in my dye studio that gives me more freedom and allows me to work faster.

I still remember when I first met quilters who dyed their own fabrics. At the time my twins were 6 and my daughter was 4. My initial thought was how will I ever have time to make a quilt if I also have to dye my own fabric first! My second thought was how will I be able to cut up a fabric that I dyed if I really liked it and didn’t know how to reproduce it? While these thoughts reflected my total ignornance about dyeing fabric, they also drove me to learn. I took one or two dye classes while living in New Zealand, but didn’t really enjoy it much. Dyeing is messy. I choose fabric as my medium over paint for a reason! Then I learned about a class that taught you how to not only dye fabric, but also how to reproduce colors. Now this was exactly what I wanted. The class was Color Mixing for Dyers taught by Carol Soderlund.

I took my first class with Carol at Nancy Crow’s Barn. In one week I created a recipe book with samples for over 1000 colors. It gave me a strong foundation to build on, and formulas to help me achieve the desired results. I highly recommend Carol Soderlund as a dye instructor. She is absolutely amazing and her breadth of knowledge is most impressive. I have seen students bring her fabrics and ask her why the fabric turned out as it did. Carol could always answer them. For example I showed her a fabric that turned out incredibly blotchy. In several places this hot pink fabric had white splotches. She immediately asked “Did you cure the fabric in the sun?” I replied, “Yes, why?” She answered, “It’s blotchy because some of the fabric dried out in the heat.” Just one glance was all she needed. I have taken most of her classes, and hope to study more with her in the future. If you have the opportunity to study with Carol, take the class!!

For over a decade I faithfully used the formulas I learned in Carol’s classes with great success. And as is usual with most skills, the more I dyed the better I got at dyeing. I also started to notice more in the work of other dyers. I had a friend I met at the Barn, Barbara Bugliani, whose fabric was particularly unique. We had both studied with Nancy Crow and had been in some of the same Soderlund classes together. Her colors were subtly more complex than what I was producing. Last summer I asked her how she was creating such rich colors.

Barbara is a retired elementary school art teacher who has worked in many mediums. First, she mostly dyed by eye. Also Barbara rarely used only three primary colors. She would usually mix two shades of the same primary color in her dying. And she added drops of chino, grape or silk black. Her answers gave me greater freedom in my dye studio. So I took this new information and added it to what I had learned from Carol Soderlund. I measured less, mixed more and started creating colors that were slightly more complex.

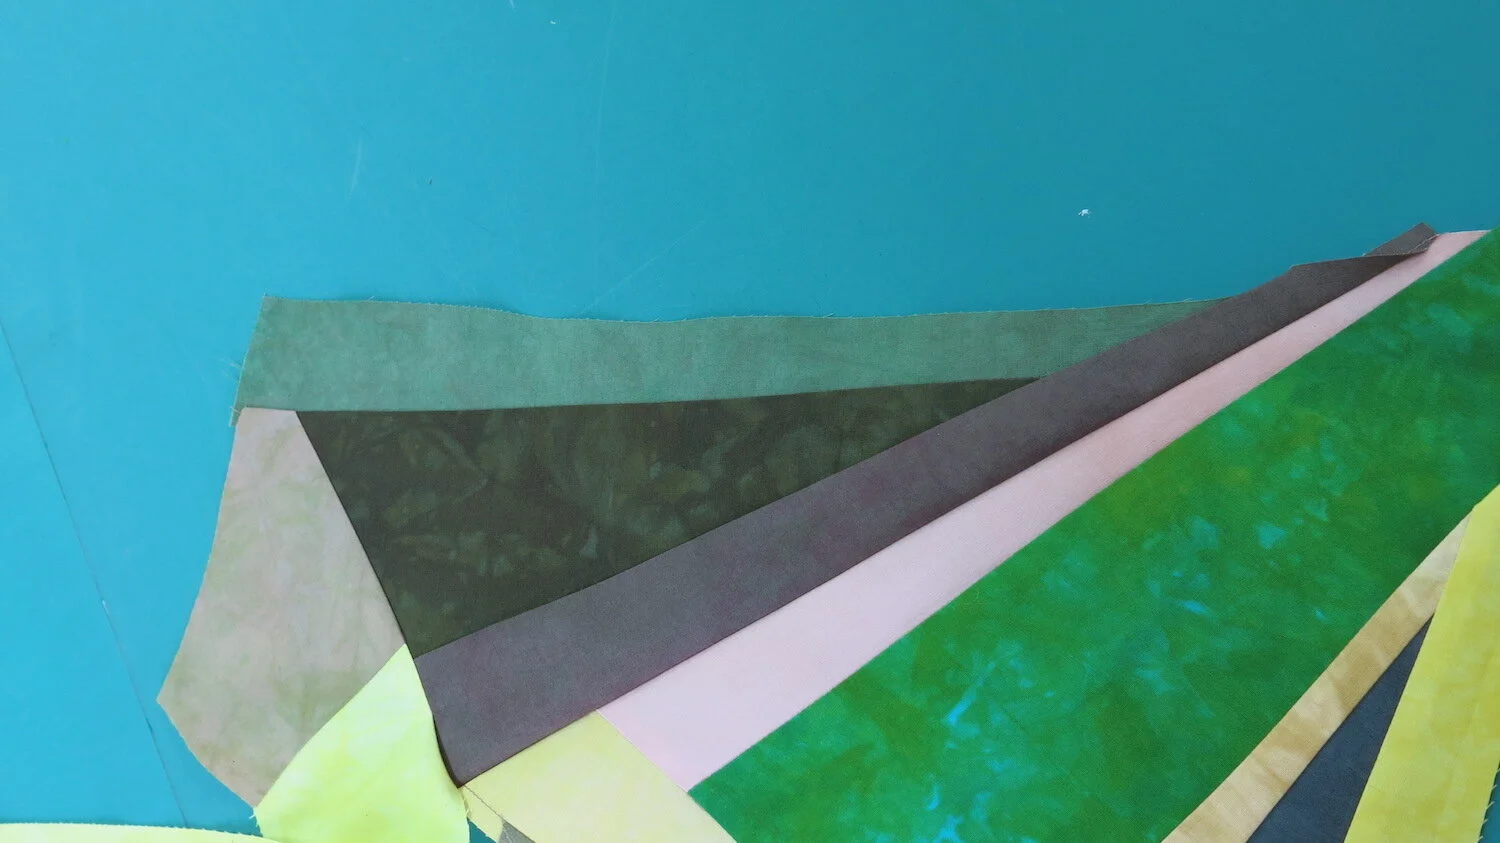
The last new change in my dye studio was repeatedly going back into my dye bathes. Instead of laboriously measuring out each gradation of a color, I simply started with 500 ml of dye on a 180 WOG cloth. When I took out the first cloth I added a new piece of fabric to the dye bath along with a little more water. I could get 6 to 7 gradations from each of these. If I got bored with the gradation I would throw in a little more dye, gently transforming the hue. So much faster, and definitely more fun.

So I have found a way to continue to be productive despite these uncertain times. It is not how I originally planned to spend my spring, but at least I am still moving forward. How are you keeping yourself moving forward?

Moving from How to Why

In 2002 I shifted from traditional quilts to pursuing quilt making as an art form. This was inspired by my first class with Nancy Crow. I first learned about Nancy Crow through her book Nancy Crow: Quilts and Influences published by the American’s Quilter Society in 1989. I bought the book in the early 1990’s because I liked the cover. The content of the book was unexpected. Here was a serious artist who choose quilt making as her medium. In this book Nancy Crow shared this journey. I read every page. It was so inspiring. My dream was to some day take a class with Nancy Crow. As one of the most recognized artists in quilt making both nationally and internationally, her classes were in high demand. Ironically, it wasn’t until I moved to New Zealand that I was finally able to get into a class with Nancy. Her four-day class was held less than 5 miles from my house in Browns Bay, New Zealand.

In 2003 I began my pilgrimages to The Crow Timber Frame Barn in Baltimore, Ohio just east of Columbus. When my husband took a job at Michigan State University in 2006, my first thought was — it’s only a four-hour drive to the Barn! There I continued studying with Nancy Crow as well as other prominent teachers including Carol Soderlund, Ned Wert, David Hornung, Jan Myers Newberry and Dorthy Caldwell. In these classes I learned about improvisational piecing, composition, color theory, mark making and cloth dying. I also learned how to work as an artist. If you are serious about developing as a fiber artist, I highly recommend classes at the Barn.

In these classes I learned a lot about how to do things. And this was essential for me to understand my medium. I also learned how to develop my eye. Listening to all the critiques helped me learn how to look at a composition. But eventually I moved from asking how to wondering why.

I vividly remember working on a composition in a class with Dorthy Caldwell. I had three abstract figures on my design wall and as I was looking at it I suddenly wondered why should anybody care about these figures. To grow as an artist eventually you have to move beyond asking how, to asking why. This is how you find your voice.

Here is a small study I did in 2009. At the time I was still working in commercial cottons and was working on my creatures series. I do not consider this mature work, but it was essential to my growth. I think it is very important to be consistently creating in order to grow as an artist. I still really enjoy this little piece and find it interesting that even back then I was interested in trees; however, I think in this piece it is obvious that I have studied with Nancy Crow.

“Three Trees” 21” w by 16” h 2009commercial cottons, cotton batting

“Three Trees” 21” w by 16” h 2009

commercial cottons, cotton batting

Below is a more recent piece. I designed this on an art retreat at the Crow Barn in 2018 where I was exploring value placement around my figures. Again it is commercial solids because it is a study. I just finished machine quilting it. My voice is more distinct.

So where are you in your artistic path? What questions are you asking yourself in your studio? Have you moved from how to why?

“Red Plant Study” 51” w by 43” h 2020commercial solids, wool batting

“Red Plant Study” 51” w by 43” h 2020

commercial solids, wool batting

Chaos and Creating

I have always found it difficult to create in the midst of chaos. When we lived in New Zealand my studio was in our lounge (NZ for family room). On weekends my husband would take our young children out to give me time to work without interruptions. But before I could start working, I had to straighten the pillows and fold the throws on the sofa. This baffled my husband. Why would I waste my time doing this? He did not understand my need for visual order in the space I was working.

I had big plans for March. I hoped to design and piece 3 new smaller scale works. These are part of a new series I am exploring. My husband and I started the month going on a trip to Jamaica. This was the first time we had ever gone away together over his spring break. It was also the first trip we had taken in many years that wasn’t related to work, family or medical events. It was just us going somewhere fun for four nights with no other agenda than enjoying being together. Then we came home.

First my husband was told to prepare to teach his MSU classes on-line. In less than a week all classes were on line and all students were encouraged to go home. Same thing happened at my daughter’s university. My daughter, who has not lived at home for almost 2 years, moved home. I spent the next week shopping. I made sure all of our prescriptions were filled. We even bought chicks so we can have our own eggs in a few months. Lots of uncertainty and fluctuating emotions. Difficult to find time to work. And then the quarantine began.

This reminds me of when my daughter and I changed our diet to eating gluten and dairy free. My daughter was only 12 at the time. For her especially it was a difficult transition. It seemed like all of her social activities involved pizza. So we chose to focus on all of the delicious things we could eat. I worked hard to have homemade gluten and dairy free baked goods on hand. We found tasty new recipes for lunches and dinners. Now nine years later our diet is well established and much easier to navigate. At times we still hit bumps, but it is manageable.

With the quarantine I am establishing new habits. I begin my day with gratitude. I am thankful for my hot shower. I am glad I have heat, electricity and internet. My husband and sons have jobs they can continue to do from home. My parents are safely in their new home with my sister and brother nearby to help them. Crocuses are blooming. Daffodils are not far behind. Trees are beginning to bud. I am grateful for Spring and new growth.

In my studio I have plenty of fabric, thread, and ideas. I also have plenty of dye and PDF fabric for my dye studio. I have several tops basted and ready to start machine quilting. And I am supposed to stay home! Now is a time I can focus my energy on creating, but first I must let go of all of the things I can not control. I am letting go of uncertainity. I am honing my focus on what I can do.

I did not reach my goal of three new pieces for this month, but I did make one. Again, I am choosing to focus on what I have accomplished. I have not shared a work in progress before, but I thought I would make an exception in light of the circumstances. Observing the beauty of nature comforts me. To me trees are especially majestic. In each season deciduous trees have a different kind of beauty. In winter time I love seeing the bare branches. Each species of trees has subtle differences in their branching forms. So much variety. My new series is on trees. Here in Michigan I am surrounded by trees. Many over 40 feet tall. The strength of a tree is in its trunk. These tall trees have weathered many years. As I focus on learning from their beauty, I am calmed and re-centered. I can create.

Working title "Red Tree”, 3rd in a series. Pieced top approximately 48” by 48”.

Working title "Red Tree”, 3rd in a series. Pieced top approximately 48” by 48”.

A Special Inheritance

Last week I was in Lancaster, PA helping my Mom downsize as my parents prepare to move. My Mom still had my wedding dress (this June will be my 29th anniversary) among many other things from my past — photos, awards, and other memorabilia. She also had cross stitches and quilts I had made and given to her through the years. Now was the time for her to give them back because her new home will not have a place for her to display or store these items. But among the things my Mom wanted me to take were her mother’s old quilts. I am the only quilt maker in the family. I named my daughter for my beloved grandmother Wynona who taught me how to sew.

My grandmother was an excellent seamstress who made most of her family’s clothes. She didn’t really make many quilts. The quilts I inherited were quilts that belonged to my grandmother, but were mostly made by others. I know this because two of the quilts are album quilts where many people would each make a block and sign their name in the center. These kind of community quilts were often given as gifts to someone when they were moving away or for special occasions. Plus my grandmother told me she did not make many quilts.

The first quilt pictured below is a fan design. What I found most remarkable about it is that it is machine quilted. I did not realize that anyone was machine quilting in the 1930’s. Looking at the detail you can see that the stitch length is very large. It is a joyful piece. I love the shade of red in the blocks and in the very fine binding.

Antique Fan Quilt

Antique Fan Quilt

Detail of Fan quilt

Detail of Fan quilt

Next is an album quilt with a peach sashing around the blocks. I love the patterns on the old fabrics. I also love the pink sashing used at the bottom when the maker ran out of the peach. It gives it a bit of whimsy. The detail photo is a shout out to Mae Cormelly. I especially loved her fabric and choice of embroidery color.

Peach Album Quilt

Peach Album Quilt

Detail of Peach Album quilt

Detail of Peach Album quilt

The white album quilt held a special surprise. This quilt was also machine quilted with a very small stitch length. As I was pinning this quilt to my design wall to photograph I saw my grandmother’s signature with her maiden name. Years ago I had seen this quilt with her name on it, but no one else could recall it when I asked about it. It was very moving to rediscover this quilt with her identifiable signature. Also one of the women embroidered a place name on her signature— Oshawan, Minnesota. So this helps me date the quilt. My grandmother married around 1934/35, and my mother was born in Minnesota. This may have even been a wedding gift.

White Album Quilt

White Album Quilt

Detail White Album Quilt

Detail White Album Quilt

My grandmother was so very dear to me. She did not live to see me marry or name my first born daughter in her honor. She taught me how to embroider, crochet, knit and sew. In awe I watched her make her own pattern to sew a dress for my doll after my brother had pushed me and my doll into a stream when I was 4. I loved playing in her bags of fabric scraps. She made me clothing that I loved. One flannel night gown I wore until I ripped out the shoulders. She was a very loving person who was also very fun. She loved to play games and she was an excellent baker. Most of all she was a woman of faith who lived an authentic life accurately reflecting the love of God to those around her. “Love is patient, love is kind. It does not envy, it does not boast, it is not proud. It does not dishonor others, it is not self-seeking, it is not easily angered, it keeps no record of wrongs. Love does not delight in evil but rejoices with the truth. It always protects, always trusts, always hopes, always perseveres. Love never fails.” 1 Corinthians 13:4-8a. Thank you grandma Wynona for this legacy of Godly love. Until we meet again….

Seemingly Small Adjustments

My work contains many angled pieces. Sewing angled pieces together requires offsetting the ends to have the final seam line up properly. If your angle is a true 45 degrees, you place the tip of the piece one quarter inch above the straight edge and then sew. You will get a perfect seam. But most of my angles are rarely close to 45 degrees. The more acute the angle the more I need to offset the edge. (Acute angles are all angles less than 90 degrees.)

While working on my latest large composition I sewed a seam that was about 14 inches long. The full seam is pictured below. Look at the top muted green piece about the dark olive triangle. The left side is barely off, but the right side, where the muted green meets the dark gray it is off by about an inch.

Look at top muted green piece above the dark olive triangle.

Look at top muted green piece above the dark olive triangle.

Here are photos giving a closer look at the two ends of the seam. Many quilters who work improvisational will just trim down and keep going. On the left side of the seam I will lose only an 1/8 of an inch, but on the right side I will lose almost an inch on multiple pieces. When you work in large compositions like I do and almost every seam is angled, this significantly impacts the overall design. My large pieces have over 500 hundred seams. An inch here and an inch there quickly adds up!

Out of personal curiosity I photographed the ends. I wondered how much difference it would make if I fixed the side out by only 1/8” of an inch. Then I ripped out the seam. Repositioned the edges slightly and sewed it again. This time the edges lined up almost perfectly. Now I did iron the seam differently, but you can still see that I gained over 3/4” on the other side. While you may still not believe me that this makes a big difference in the overall composition, I did prove it to myself by documenting my process. I was assessing if it was worth the time to rip out and redo the seam. To be honest I was a bit surprised to see how big of a difference it did make. Final analysis, yes it was worth the time. And I apologize to any non-sewers who may feel I am down in the weeds.

But I also think that this has a broader application. During the child raising years, I often would not even go up to my studio to work if I could not be up there for at least 2 to 3 hours. (Looking back this was a ridiculous expectation.) Then I read about another artist who tracked her time in 15 minute segments. I wondered to myself what tasks could I accomplish in 15 minutes if I tried. I reconsidered my attitude toward time and my studio. So I started going up to work for these smaller segments of time. Guess what! This led to more time in the studio. On days where I once thought I did not have enough time to get anything done, I began to carve out an hour here and 30 minutes there. It may sound silly, but for me it was truly life changing. A little progress in a day is better than no progress.

I am starting to assess other areas of my life. Wondering what other small adjustments I could make to reap greater benefits. Specifically I am considering giving myself more boundaries around my cell phone usage. What seemingly small adjustments could you make?